If you have seen our social media post about the wonderful rainbows appearing on windows to support the NHS; then you will already have heard of the lovely Diana Brook of Heddfan from Narberth.
Our team met Diana for one of her lino printing workshops to make Christmas cards last year and we all loved it. So when I saw that she was offering a variety of craft kits to do at home, including this stamp making kit, I jumped at the chance to nab one and try it out. Plus, at £15, it is excellent value!
 My stamping kit with a cheekily little extra ink pad and lino tile added in
So, what’s in the kit?
1 x lino cutter and baren 3 in 1 set
2 x different coloured ink pads
2 x PVC-free erasers
2 x gift tags*
I also had a lino tile and extra ink pad so I thought I would play around with them too.
*The kit now comes with a card for printing instead.
You might wonder why there are erasers in the kit, but if you’re lucky enough to attend one of Diana’s face to face classes you will know how creative she is and how flexible lino and stamp making is. Diana explained to us that erasers are a great value and a simple way to create small stamps. The gift tags are going to be perfect for this!
So first off, unless you have crazy instinctive skills, it’s best to sketch out a design on paper before you commit to drawing or cutting into your lino or eraser.
You might not think you know where to start, but don’t panic, there is inspiration everywhere!
 Flamingo's taking shape before I commit to drawing on the eraser
For my example, I’m very excited about this fluorescent pink, if you know me, you’ll know that’s MY kind of colour! So that’s my inspiration.
When I think pink, I think flamingo! Don’t we all? So that’s my first go; I searched online for images of flamingo’s and looked for something on my level (simple) and then started sketching my own to see what I liked and what I thought would work. To be honest, even after I sketched my design, I re-sketched it a few times until I felt confident that I would be able to carve it out.
Obviously cutting out a pattern is not like drawing, try and keep the shape and pattern simple and remember that what you carve is going to be your negative space and what you leave, will be your colour. Even if you get it wrong the first time, you don’t cut that deep, so you can always use the other side!
Remember! When you use your stamp, your drawing will print in reverse (note: lettering is tricky!)
 My flamingo, tweaked and tweaked and tweaked again.
Once you have cut out your design, you might find stray bits of colour from bits of the eraser you thought you had cut deep enough and hadn’t. I think it was about 10 times a charm for me!
Sometimes the lines look arty and you’ll want to leave them in, other times it looks like you just can’t colour within the lines and you’ll want to remove them.
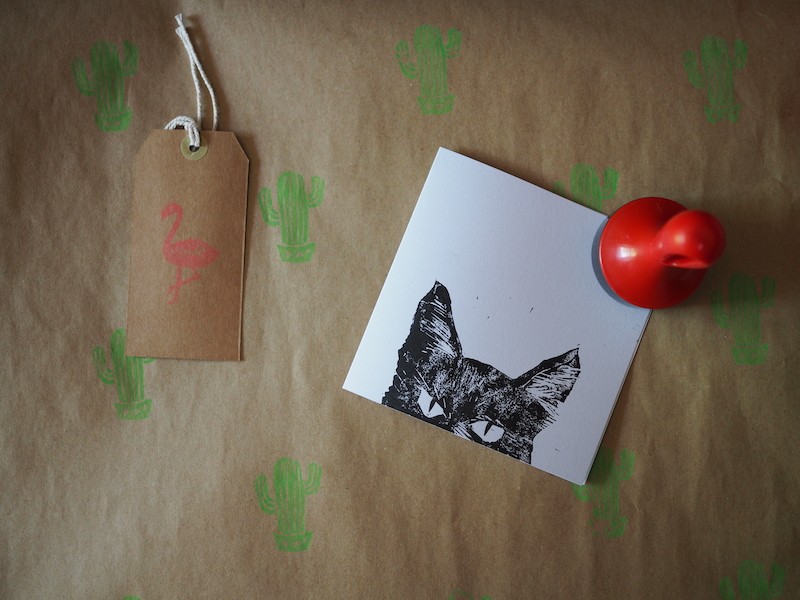
 I also went for a cactus (because, green) and my cat (because, black).
I’m not a deep soul as you can see…
I am pretty happy with these! Yes Bailey the cat really is that cross-looking too.
I went for simple patterns and repeated this on plain brown wrapping paper that I already have (of course I do), but this could be used for cards, gift tags, pictures and the ink says it’s suitable for fabric and wood too so you could make patterned t-shirts or tote bags.
The possibilities are endless!
 The final set from stamp kit!
Naturally I have milked this, so my niece is about to get her handmade gift (naturally) in cactus wrapping paper, with a flamingo gift tag and a cat card!
Lucky girl ?
If you want to try this stamp making kit we’d love to see what you make, plus Diana is offering the kit with LIVE online tuition too!
You can also take a look at all of Diana's workshops and kits here and check out all of the creative options for staying crafty at home here.
Plus, if you enjoyed reading this have a browse of all of our recent lockdown articles >


